
Install Amiga Workbench on real Amiga using WinUAE
Date: Monday, February 20 2012 @ 16:13:41 UTC
Topic: Amiga Tutorials
In this tutorial I want to show you how to install Amiga Workbench 2.1 on standard Amiga computer using WinUAE with some basic hardware and software. Please understand that you need lot of patience to finish this process but I provided more than 50 pictures for guidance and this should be enough to get you started. I can't provide you needed hardware and software so don't ask about that.
Any comments related to problems, suggestions and upgrades related to this tutorial you may post on FORUM. Thank you and wish you nice time with your Amiga :)
Hardware needed:
Windows based computer
Amiga with IDE controller ie. Amiga 600, Amiga 1200 etc...
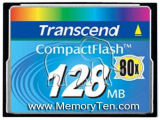
CF card
CF card reader
CF to IDE 2.5 inch adapter
2.5 inch IDE cable




Software needed:
WinUAE DOWNLOAD
Workbench ADF files
Amiga Kickstart ROM image


1. Test CF card
Insert CF card to CF card reader and format it to FAT.
Formatting CF card to FAT is not important here but in some cases you may find out that there are some problems with your CF card and it is better to make shore that your CF card is OK before you go to the next step.
|

|
2. Setting WinUAE startup
Start WinUAE with -disableharddrivesafetycheck command who gives possibility to enable read/write functions for hard disk or in this case CF card.
To do that create shortcut of WinUAE left click on that icon and select properties and in Target section add -disableharddrivesafetycheck
|

|
3. Starting WinUAE, basic settings and starting Amiga Workbench
After that double click on that shortcut and start WINUAE. Please use settings that you have on your Amiga computer, don't use some accelerator cards that you dont't have or more memory because that can lead to some problems when you try to add that CF card to your Amiga computer. Changing settings can speed up installation but can drive you to the number of problems for example if you use Kickstart version that you don't have some of the programs you add later using WinUEA can add settings related to that Kickstart and when you back CF card to your Amiga it can lead to system failure. Examples of this we can see if we upgrade our CF Workbench 2.1 installation with Magic Workbench using WinUAE on Kickstart 3.1 that we don't have in our original Amiga system, or problems related to resolutions and number of colors. Or in the situations when you are using your CF Workbench installation on WinUAE with WHDLoad to test games so you can transfer them to your Amiga and then to find out that those games works in WinUAE but on Amiga they don't just because you selected settings in WinUAE that are not identical to your Amiga.
Starting system you may see this message but don't worry just click OK and WinUAE should start.

Go to the Quickstart and select Amiga configuration that you own. As I have "stock" Amiga 600 I ll select that.
Then go to the CPU and FPU section to check that everything is fine. Also check Chipset and RAM settings.


Then go back to the ROM section and add location of your Amiga Kickstart ROM image.

Go to the Hard drives and click Add Hard Drive and new window will appear. In that window select your CF card connected to your CF reader. As HD controller you can use IDE0 if you don't have some other devices connected because that could drive to conflicts and problems may appear when you are starting Workbench directly from HDF file or some Hard Disk or CF card. If this doesn't work for you try use UAE controller. Check read/write and click add hard drive and new drive will appear. You may also check Include removable drives and check Automount removable drives but in most of the cases this is not necessary. With checking last two options you will be able to see CF card from Workbench window even before is formatted to FFS or some other file system but sometimes this can drive WinUAE to crash.


Then go to the Floppy drives and check DF0: and add location of installation disk of Amiga Workbench, in my case wb21_install.adf also uncheck write-protected because sometimes installation will not work until you uncheck this option. You may also include other disks needed for Workbench installation so if you want to do that check other Floppy drives and add locations for disks like extras, fonts, locale... In my case those are wb21_extras.adf, wb21_fonts.adf, wb21_locale.adf. If you don't include other disk from the start you can add them later when Workbench installation ask from you to insert other disk needed for installation. In that case just press F12 and go to the Floppy drive section of WinUAE and then add location of needed disk, and click OK to back to the Workbench installation, wait for few seconds and installation of Workbench will continue.


Now it's perfect time to save your configuration so you can use it later if you need to do some modifications or to repeat process of installation Workbench to some other CF card. Go to the Configurations and type name of your configuration and click Save.

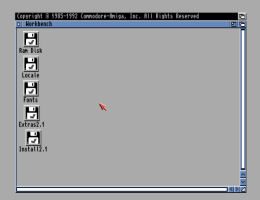
Click Start and there it is Amiga Workbench 2.1 started using WinUAE. Please remember if you have to back to the Windows from WinUAE click middle mouse button, and if you have to make some changes in WinUAE settings hit F12.
4. CF card preparation for installing Amiga Workbench
On Workbench window click on Install 2.1 and go to the HDtools section and start HDToolBox.
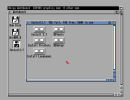


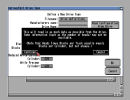
Select drive and click Change Drive Type, again select drive and click Define new drive type. On next window click Read Configuration From Drive. After that click continue and then your drive will be detected. You can change Manufacturer name and drive name or drive revision to something you want. Click OK and again on next window click OK and you can see that CF card is detected like is shown on the last picture of this section.




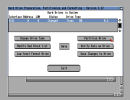
Click on Partition Drive, and then click to Advanced Options. In next window we can see that default setup created 2 partitions booth with 61MB named TDH0 and TDH1. You can also see that TDH0 partition is bootable with boot priority 0 and THD0 is not bootable so it can be used to store games, images and other files. If you don't like this setup you can just click Delete Partition and set partitions you like it but please remember that one of them must be bootable with boot priority 0. On that partition you will install Workbench. if you don't set it like this Workbench won't start. As I don't want two or more partitions since this CF card I m using is just 128MB I ll create just one THD0 bootable partition with boot priority 0. Click OK and click Save changes to Drive and check drive for errors clicking on Verify Data on Drive. After Drive is checked click Exit.


Sometimes you need to restart WinUAE to continue. Hit F12 and then restart WinUAE.

After WinUAE is restarted, and Workbench started again you can see that your CF card is detected and in most cases is already formatted and ready for usage. But just in case you need to format it click on icon that represent your CF card, in my case WB, left click select Icons and then select Format Disk and new window will appear. On new window add New Volume Name, check Fast File System and format the drive. Formating the drive may take some time depending on the size of your CF card. After finished we have formated FFS CF card, in my case, with 122MB of free space. Please remember that if you have more partitions or more CF cards first format one that will be used for Workbench installation, other ones you can format when you install Workbench. This way you can prevent your Workbench installation to be installed on some partition or drive you don't want.


5. Amiga Workbench installation
Close any open windows and double click on Install2.1, and then on Install 2.1 and select language of your Workbench installation. In new window Set Installation Mode and Proceed With Install. In next window Workbench installation will ask you where to install Workbench, and if you don't see any drives click Show Drives, select drive, in my case UDH0: WB: and click Proceed. In next window Workbench gives you some informations about installation. Click Yes to continue.
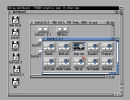


During installation you may get some messages to insert disks needed for Workbench installation. Those disk could be extras, fonts, locale or in my case Workbench disk because I didn add that one in any emulated Floppy units of WinUAE. To solve this I ll hit F12 and take back to WinUAE configuration select Floppy drive section and set location of my Workbench adf file in DF3: or any other WinUAE emulated floppy drive. After that back to the Workbench, wait for few seconds and click Proceed and if everything is OK installation will continue.


There are some basic settings and questions that your need to set up during Workbench installation regarding your printer and language you may want to use.


After some time Amiga Workbench is installed, click Proceed to finish installation.

Now it is time to test our installation from WinUAE. Hit F12 and restart WinUAE. Go to the Floppy drives configuration and uncheck all floppy drives and hit Start. If everything is OK Amiga Workbench should start right from your CF card.

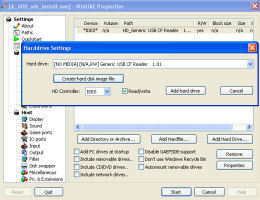
After Amiga Workbench is started you may want to save your installed workbench on your Hard Disk and use it as backup or testing system. Saving your installation is giving you opportunity to install programs or modifications and to test is before you want to use it on your Amiga. This way you may prevent some problems and if something goes wrong you can always start your installation again or copy it back to your CF card. To create backup system hit F12 and take back to configuration menu of WinUAE and go to the Hard drives section, double click your CF card and click Create hard disk image file. Please remember that extension of that image file is *.hdf. If you want to copy back your backup to CF card you need to make shore that Wokbench is started from *.hdf file. To do that click on Add Hardfile, add location of your image file, select Bootable
and set Boot priority to 0. Remember that Boot priority of detected CF card must be higher than Boot priority of image file. After Workbench is started from image file format your CF card to FFS and copy all Workbench content to CF card. Remove your CF card from card reader and take it back to Amiga and system should start.
6. Starting Workbench on Amiga
There are only few steps to finish your work. Remove your CF card from card reader and insert it to CF to IDE 2.5 inch adapter, connect adapter to Amiga IDE controller using 2.5 inch IDE cable and that's it. Start up your Amiga and enjoy :)


|